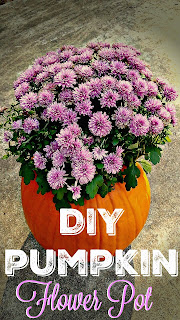
If you are anything like me, the beginning of fall is more than a breath of fresh air, it's a form of euphoria! The smell of the crisp leaves as they begin to change and fall, all the beautiful colors that look like a hand painted landscapes, big bulky sweaters and boots without the fear of sweating to death, and of course pumpkin everything!
I'm always on the hunt for cheap decor that not only costs next to nothing but looks great and won't take up much storage space. (Cause who really has enough room to hold a billion boxes for each holiday?!) So when I saw that Ingles was having a great sale on pumpkins I couldn't contain my inner joy and had to buy 3! I wanted something that looked gorgeous but didn't look like the standard fall display at the same time....sooooo I made the pumpkin flower pot!
It's super simple but I'll attach some (cell phone) pictures for your viewing pleasure.
Find the perfect pumpkin (will have another post on how to pick the perfect pumpkin this week! Check back soon!) and the flowers of your choice. For this project I used mums in yellow, purple and red.
Cut the top off of your pumpkin and scoop out the seeds and pulp, set aside. Make 3 small slits in the very bottom of the pumpkin to allow excess water to flow out to avoid drowning your flowers and speeding up the decomposition of your pumpkin.
Add a few scoops of potting soil to the bottom of your freshly pulped pumpkin and place your flowers inside. (Make sure to loosen the soil on your flowers for optimum growth and rooting!)
Set on your display and enjoy!
(When the pumpkin starts to mush and become unsightly, if your flowers are still blooming you can bury the pumpkin under the ground where you plan on planting your flowers so they continue to get nutrients from the pumpkin as it decomposes! ;) )
Till next time,
XOXO
Becca


No comments:
Post a Comment